Everything you need to know about intra-abdominal pressure, core stability, and when (or when not) to slap on a weight belt.
Breathing and bracing — the two foundational techniques that are essential for both movement quality and injury prevention. Let’s discuss how your breath and core work together in every lift, why bracing is key for stability, and how techniques like diaphragmatic breathing and the Valsalva maneuver support heavy lifting. Let’s also break down the difference between bracing and hollowing, when to use each one, and what the current research says about their role in core activation and spinal support.
Why We Care About Breath in the First Place
Your core fires on every rep you take, whether you notice it or not. Pair that with the fact that you’re breathing roughly 20,000 times a day, and suddenly “just keep breathing” feels like a wasted opportunity. Syncing breath and brace:
-
Boosts spinal stability by turning your torso into a pressurized column.
-
Improves force transfer from legs to barbell so you can set PRs instead of plateaus.
-
Reduces low-back load because your diaphragm, pelvic floor, and abdominal wall share the work.
-
Enhances recovery—consistent diaphragmatic breathing is linked to higher HRV and better parasympathetic tone.
Diaphragmatic Breathing
Chest breathing is what we default to when we’re stressed, seated, or scrolling Instagram in questionable posture. Diaphragmatic breathing—sometimes called “belly breathing”—is how humans are built to operate:
How to Practice Diaphragmatic Breathing
-
Lie on your back with one hand on your chest, one on your stomach.
-
Inhale through the nose. The bottom hand should rise first as the belly expands; the top hand stays quiet (or moves last).
-
Exhale fully (mouth or nose), feeling the ribs knit down.
-
Practice until that expansion-then-recoil feels automatic.
Hint: Use this drill in your warm-up. Five slow diaphragmatic breaths can down-shift your nervous system and cue your brace before you even touch a barbell.
The Valsalva Maneuver: Turning Breath Into Armor
Proper preparation for the squat and the deadlift should always be mastered before the movement is loaded. Setting up for the lift is just as important as the lift itself. A truly braced core takes practice.
The Valsalva maneuver is a breathing technique used to create intra-abdominal pressure. This method protects the spine and takes pressure off of your lower back when completing heavy compound lifts. When you breathe through the diaphragm and brace the core, you increase your ability to lift heavier loads safely and properly while maintaining core stability – which will lead to greater strength overall. Many times, this practice is the difference between a PR or no PR.
When a load gets heavy, inhaling alone isn’t enough. The Valsalva maneuver pressurizes the torso like a sealed soda can.
-
Big diaphragmatic inhale.
-
Close the glottis (think “hissing without letting air escape”) or purse the lips.
-
Brace (slightly) out and down naturally (not down too hard)—abs, obliques, and low back co-contract.
-
Hold through the descent / initial pull.
-
Exhale through or just after the hardest part of the lift.
Yes, it spikes blood pressure for a hot second, so if you feel dizzy, re-set. For healthy lifters, the pay-off in spinal safety and force production outweighs the temporary pressure bump.
Bracing vs Hallowing
Complete bracing requires not only breathing, but tightening the core. Think about what you would do if someone was about to punch you in the stomach (other than dodge or defend). You would brace your core for the blow. HOWEVER, there is a difference between bracing and hollowing.
Hallowing is thought of as “pulling the belly button toward the spine” – which you may have heard in Pilates or other practices. This is also something body builders practice on stage when doing an abdominal pose. This is NOT the same as bracing. Hallowing activates your transverse abdominis, but it can put you in a less stable position during spinal loading and does not provide the same support.
Hollowing can be practiced more easily after an exhale. The belly button draws in and up toward the spine (think Pilates TVA “corset”). It’s also rally useful with twists and breath practice. Practice hallowing and bracing so that you can feel the difference.
Small EMG studies show hollowing lights up the deep TVA while bracing recruits more surface muscle (rectus, obliques). A 2024 systematic review of 22 trials concluded both improve trunk stability, balance, and gait, but direct head-to-heads are scarce. Translation: keep both in the toolbox. Use bracing when you need maximal stiffness; use hollowing when you’re refining control or pairing breath with long exhales in mobility or yoga practice.
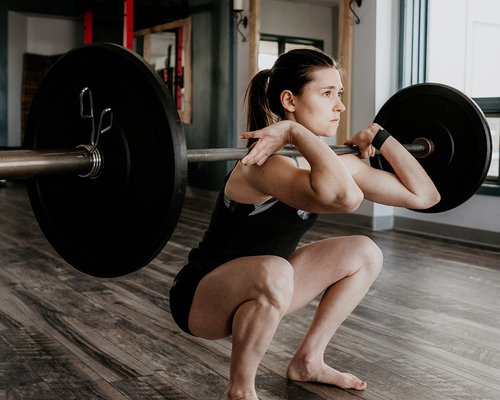
Squat Set-Up Example
Before the squat, set up in a tall position – hands placed on the bar. Many people prefer taking their first big breath BEFORE getting under the bar in order to create stability in a taller position that allows for an overall larger breath. Some people prefer to take the breath under the bar. As a beginner, keep in mind that this will also sometimes shorten the rib cage and make it slightly more difficult to take a giant breath. We typically teach both: one breath before stepping under and un-racking the bar (hold the breath as you un-rack then release once you have walked out the bar but maintain core stability), one breath after your walk-out and before your descent.
Consider thinking about squeezing the glutes to assist with bracing, take a big breath and fill the belly with air, bracing (lightly don’t force the downward brace) down and out with the core and hold in that big breath.
Begin your descent and maintain the core stability all the way down into the hole. The exhale of the breath should occur somewhere near the top end of the lift.
Keep in mind this method of breathing will increase blood pressure and heart rate for a small period of time. Very, very intense loads and large breaths have occasionally been known to create some dizziness after a lift due to the increase in pressure. This typically only happens under very heavy loads or with a very large, practiced breath. In powerlifting, the benefits far outweigh the risk for most lifters and a large breath not only feels supportive, but keeps the spine in a safe position and adds pounds to the lift.
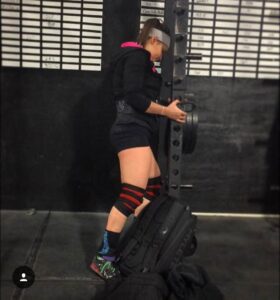
Should you Use a Weight Belt?
A belt is not a magic lumbar Band-Aid; it’s a tactile cue and pressure amplifier.
For heavier loads, many people utilize powerlifting accessories like the weightlifting belt. Think of the belt as an additional tool to increase your intra abdominal pressure. If used properly, you will experience improved biomechanics during your lift. The weightlifting belt also helps reduce excess spinal flexion, lateral flexion, or extension in the spine. In other words, you will be forced to lift through your posterior chain and quadriceps as opposed to the back taking over.
You should be making your belt as tight as possible while maintaining comfort when lifting so you can thoroughly brace your abdominals against it. You will notice how it is significantly easier to support heavier loads if you practice the Valsalva maneuver.
Make sure your belt isn’t wedged against your hips after you tighten it. This will impede your lifting as it will be uncomfortable and digging into your skin. Some people prefer a higher position while others wear the belt lower. Try different methods and see what works for you.
Training with a belt is optional. Many people only train with a belt at higher loads. Our suggestion is to train lighter loads beltless and practice bracing the core without the assistance of the belt. We typically program the use of a belt only when loads reach around or above 85% of 1RM but this is also something you can adjust accordingly.
Weight belts can be tapered or one width all the way around. Traditionally, powerlifting belts are not tapered because the same width all the way around will offer maximum support and surface area to brace and breathe against. However, some people prefer a tapered belt for comfort. If you are competing, check your federation’s rules on width and thickness for the weight belt.
Key Takeaways
- Learn diaphragmatic breathing first. Belly up, ribs down, breathe 360°.
- Use the Valsalva maneuver to create intra-abdominal pressure on heavy lifts.
- Brace (out & down) for load; hollow (in & up) for control, twisting, bodyweight only core-specific movements, and breath work. Both have value but should be used at different time.
- Weight belts are tools, not crutches. Belt smart, not early.
- Practice makes permanent. Drill the pattern with light loads so it’s automatic when things get heavy.
Looking to elevate your fitness game? Tune in to the ‘Stronger than your Boyfriend‘ podcast for expert advice and listen to this episode anywhere you get your podcasts.
Whether you seek workout tips or individual coaching, we’ve got you. Transform your body and mindset today!
Book a free consultation to get started
Resources:
Harman, E. A., Rosenstein, R. M., Frykman, P. N., & Nigro, G. A. (1989). Effects of a belt on intra-abdominal pressure during weight lifting. Medicine & Science in Sports & Exercise, 21(2). doi:10.1249/00005768-198904000-00012
Stoppani, J. (n.d.). Belt it Out. Retrieved August 22, 2016, from http://www.jimstoppani.com/home/articles/belt-it-out